How to manage Monthly Scheduler in iCare?
Monthly scheduler helps manage type-based attendance options (like AM, PM, Full-Time, Part-Time) using a monthly scheduling calendar.
Click here to see help video on the Monthly Scheduler
Table of content:
1. How to use monthly scheduler?
2. Setup of closing Days.
3. Setup of Attendance Type.
4. Setup of Special Days Override.
5. Setup of Calendar Open / Close Date.
6. Setup Rate Chart.
7 When Schedules with billing are edited?
1. How to use monthly scheduler?
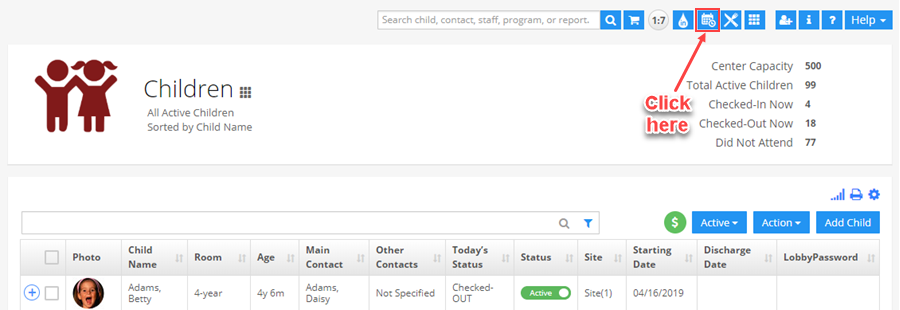
To use the monthly scheduler in iCare simply navigate to the Monthly Scheduler page form universal toolbar and follow these simple instructions (see below snip for reference).
- Select a child from the left selection panel.
- Click the settings icon next to the monthly scheduler headline and select an option out of the following;
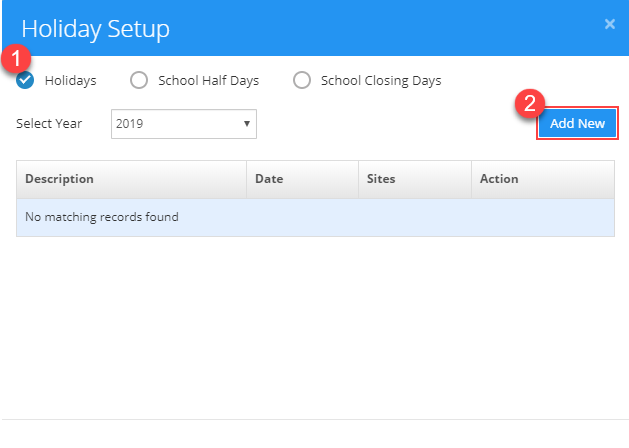
2. Setup of Closing Days: 3 types of closing days – Holidays, School Half Days, and School Closing Days to set holidays when the center is closed.
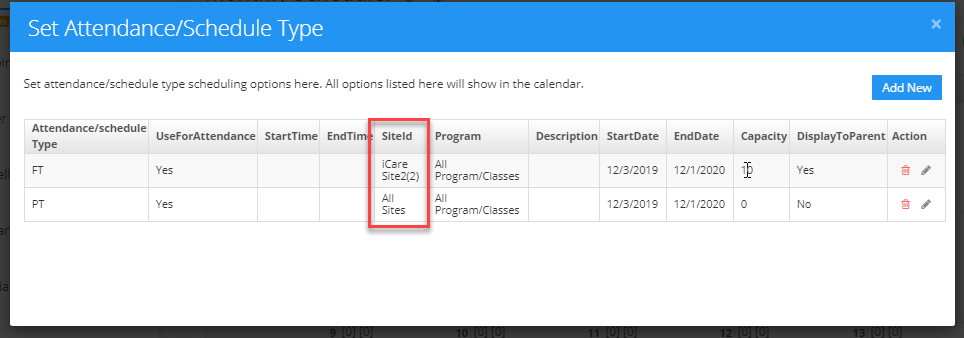
3. Setup of Attendance Type: Set attendance type scheduling options here. All options listed here will show in the calendar.
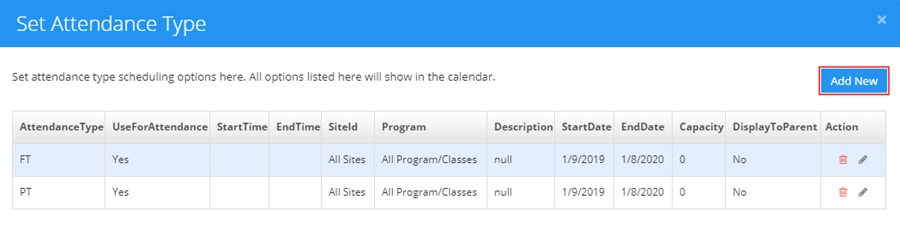
You can set up different schedule types for different locations.
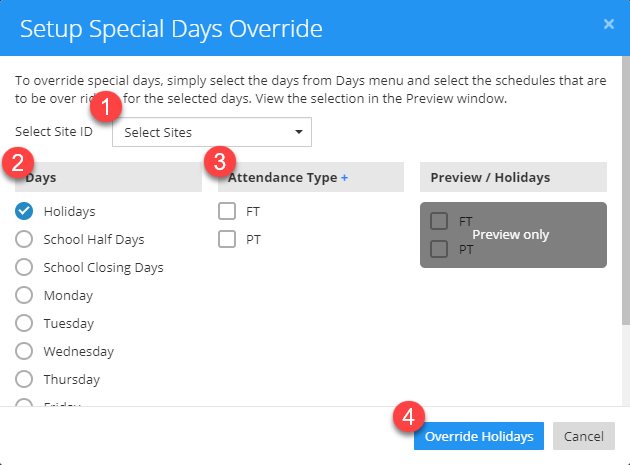
4. Setup of Special Days Override: You can have different scheduling options for special days. On those days these options will show instead of your standard options.
5. Setup of Calendar Open/Close Date:
Calendar Opening and Closing date: Set a date range based on the School calendar opening and closing dates.
Parent Registrations: Also, set a date range when the calendar will be available for registrations to parents.
Note: Parents can Add schedules on Parent Registration calendar opening dates, but they cannot edit the confirmed schedules/ past schedules.

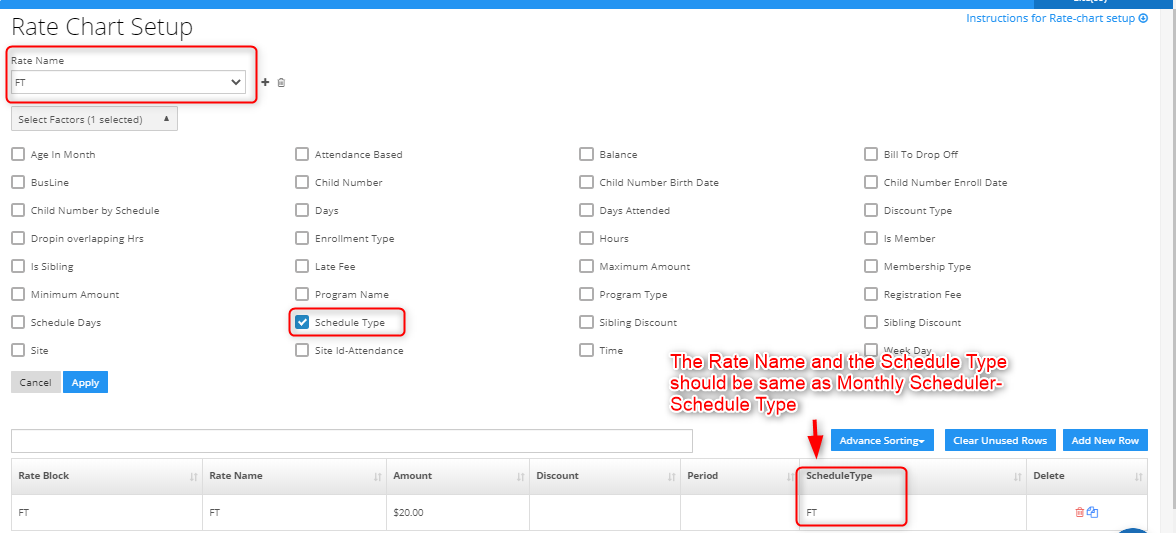
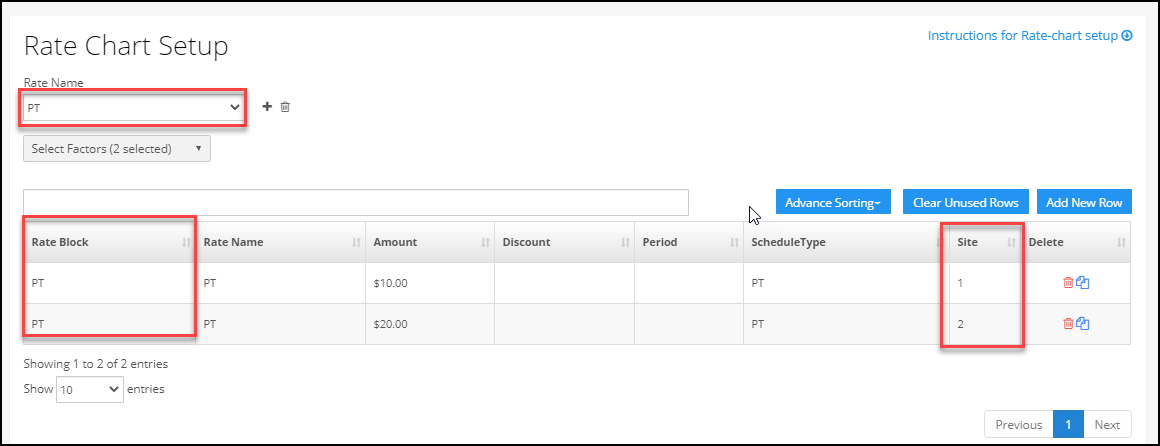
6. Setup Rate-chart: To set up rate-chart for billing the attendance types, click this option. You will be navigated to the rate-chart setup page. under Rate Chart setup page, Add a new Rate with the name of the Schedule Type and select the Rate factor: Schedule type. The Schedule type should contain the same name which is used under the Monthly Scheduler-Schedule.
You can add new rates for each schedule type under different locations. Also, if you have the same schedule under different locations with different rates, you can set it easily since we have mentioned site locations for each attendance type.
Select scheduling options in the calendar to enroll children. Selected schedules will be blue; they will turn green once billed.
Click the Calculate button to calculate and post bills for the selected schedule.
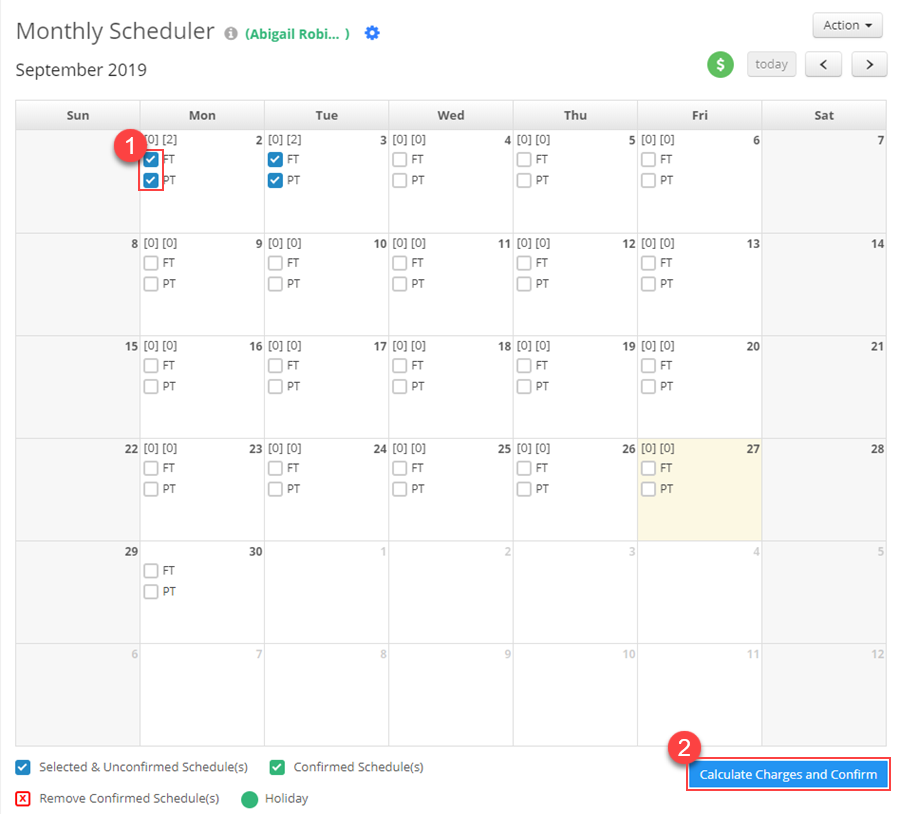
Right-click on a child’s name for drill-down options like children’s ledger, profile, journal, and messaging.
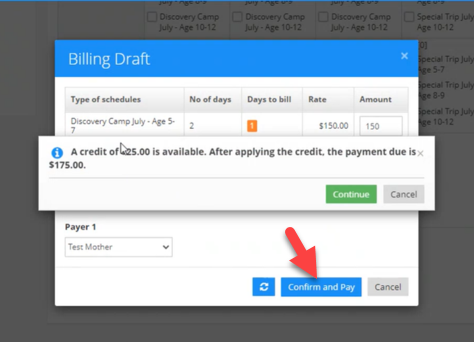
7. When Schedules with billing are edited?
In case any credit is available for a child/prayer, clicking on “confirm and pay” will show the credit amount available for the child and the payment due after applying for the credit.