GETTING STARTED GUIDE: How to get started with iCare?
Replied by : support@icaresoftware.com
To view the help video on getting started with iCare, please click here or below link,
www.youtube.com/icare/gettingstarted
Getting started with iCare is very easy, please follow these instructions to create your personalized iCare account;
Getting Started
- After finishing the Sign-up process, you will receive a confirmation email from iCare, read the instructions carefully.
- Now, you may log in to the iCare application using your Login Credentials;
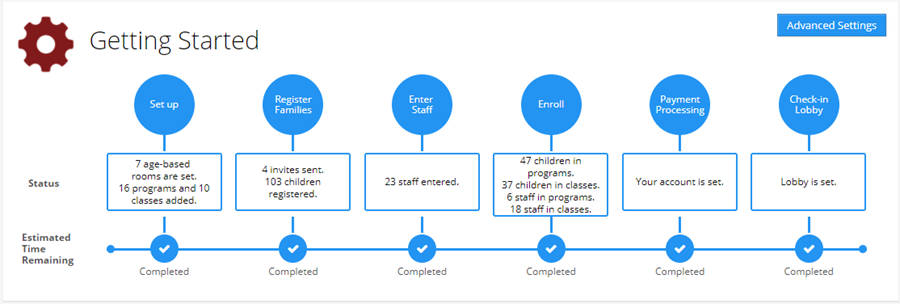
- Once you log in, you’ll be directed to the Getting Started page, where you need to set up and customize your account;
Getting started is a simple 7 step process,
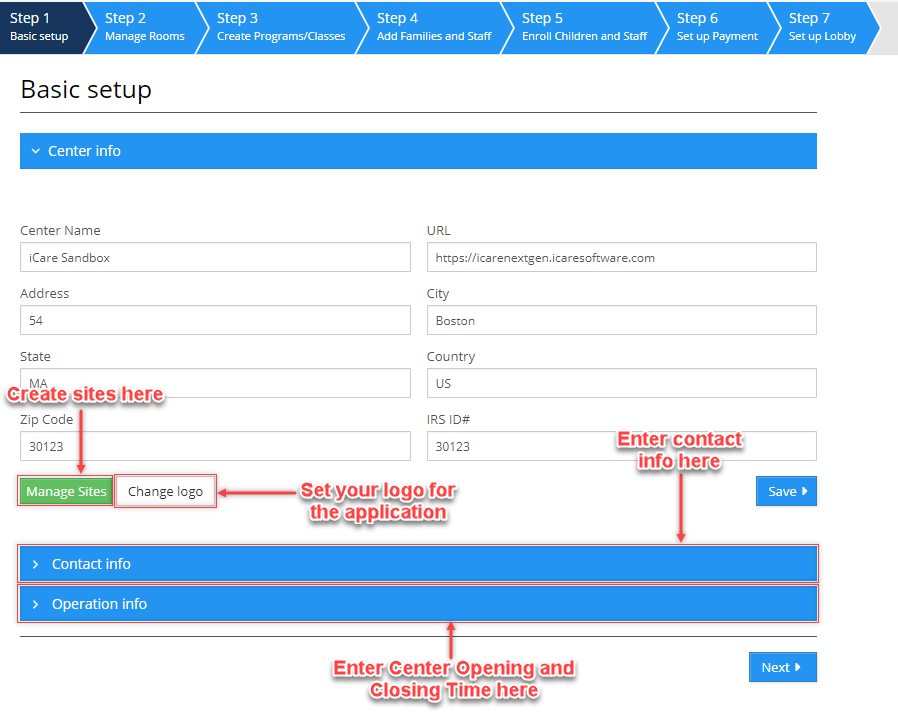
STEP 1: - BASIC SETUP
- Here, you add and edit your basic information like Center Info, Contact Info, and Operation Info.
- Click Save every time you make any changes.
- Use the Manage Sites button to create sites for your center to manage various locations (Sub-buildings)
- And, use the Change Logo button to set your own logo to use the iCare application.
- Click Next to proceed.
STEP 2: - MANAGE ROOMS
- Rooms are Age-Based groups of children to manage the child-teacher ratio at a center.
- In this Step, you may either select default Rooms from our database or create new Rooms.
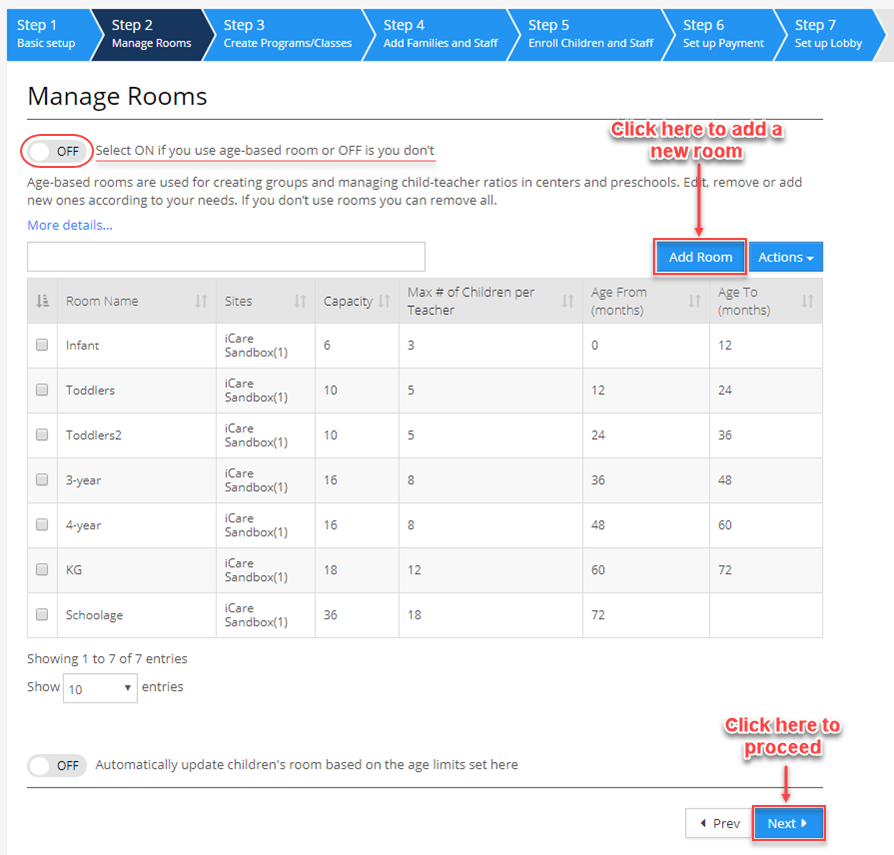
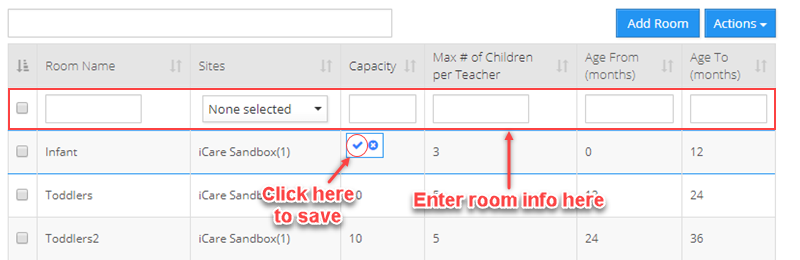
- To add a new room, click on the ‘Add Room’ button and enter the details of the new Room, click tick-mark or hit enter to save Room,
- Click Next to proceed.
Step 3: - Create Programs/Classes
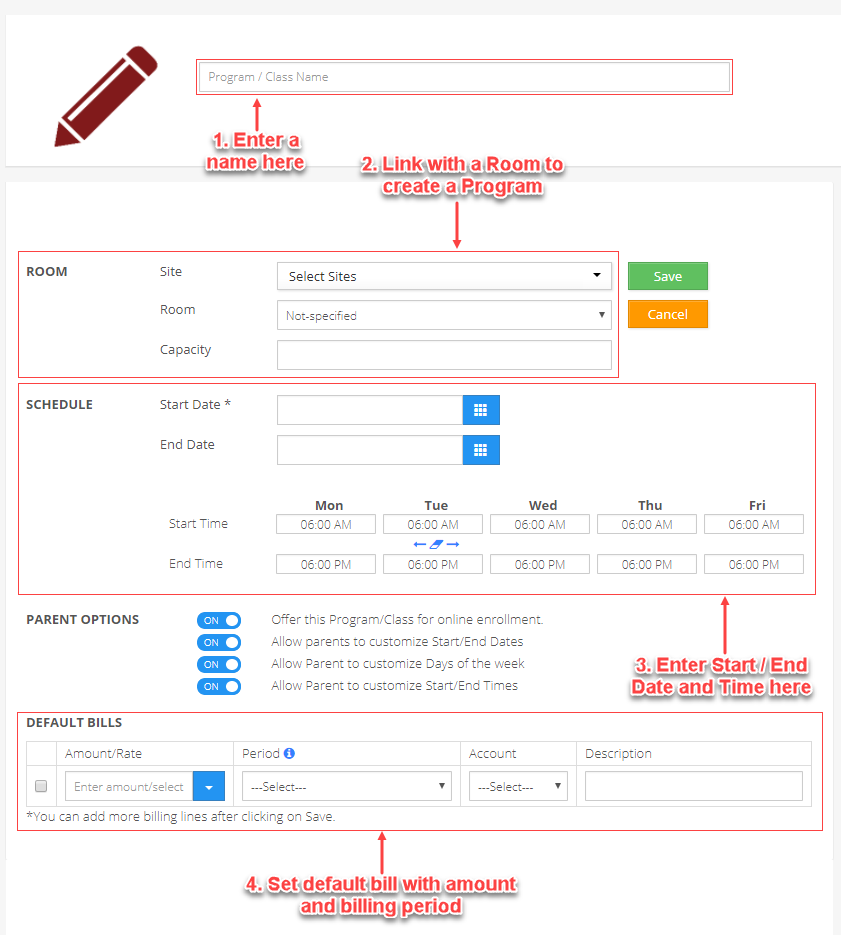
- Create new Programs and Classes to schedule children and staff. To add a new Program or Class, click the ‘Add New’ button.
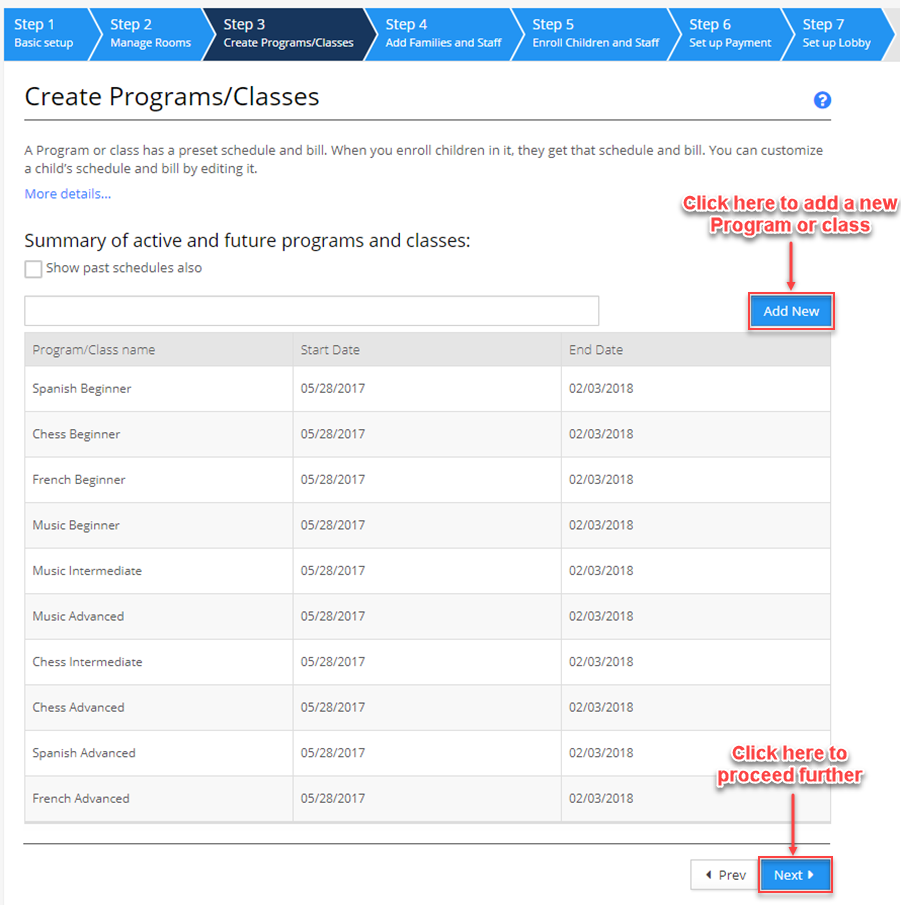
- Enter the details and click Save to add the Program/Class.
Step 4: - Add Families and Staff
- Here, you may send multiple invites to, family members of children and to staff, or you may import or add data manually.

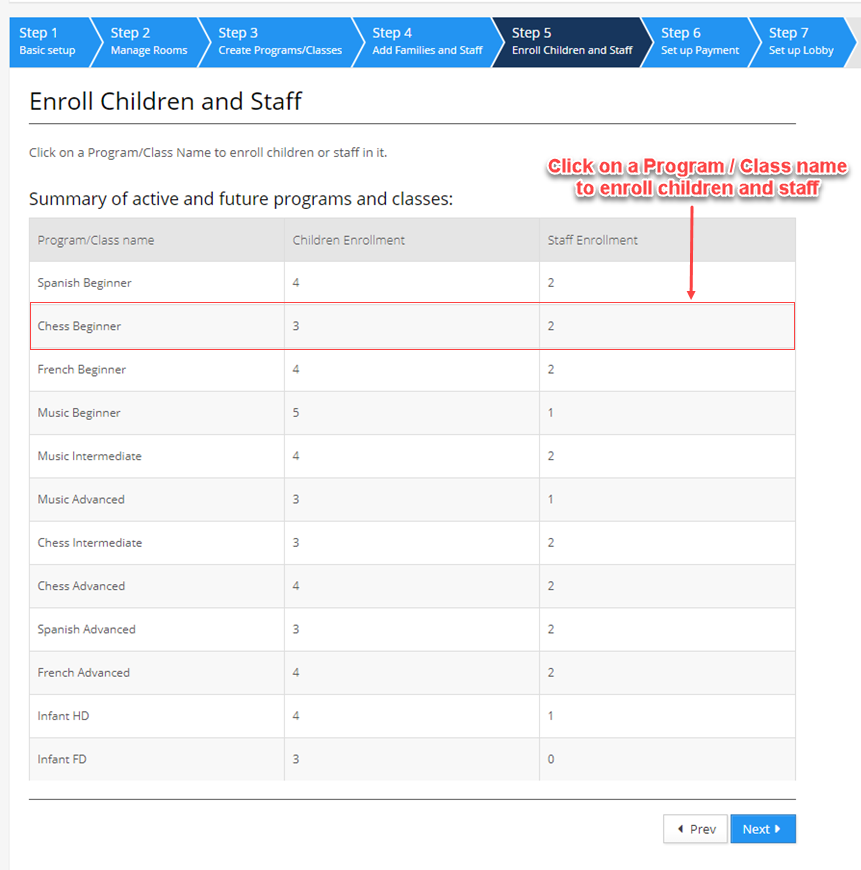
Step 5: - Enroll Children and Staff
NOTE: - At this step, you may not be able to edit the Program/Class field. To edit, you need to finish the 7-step process.
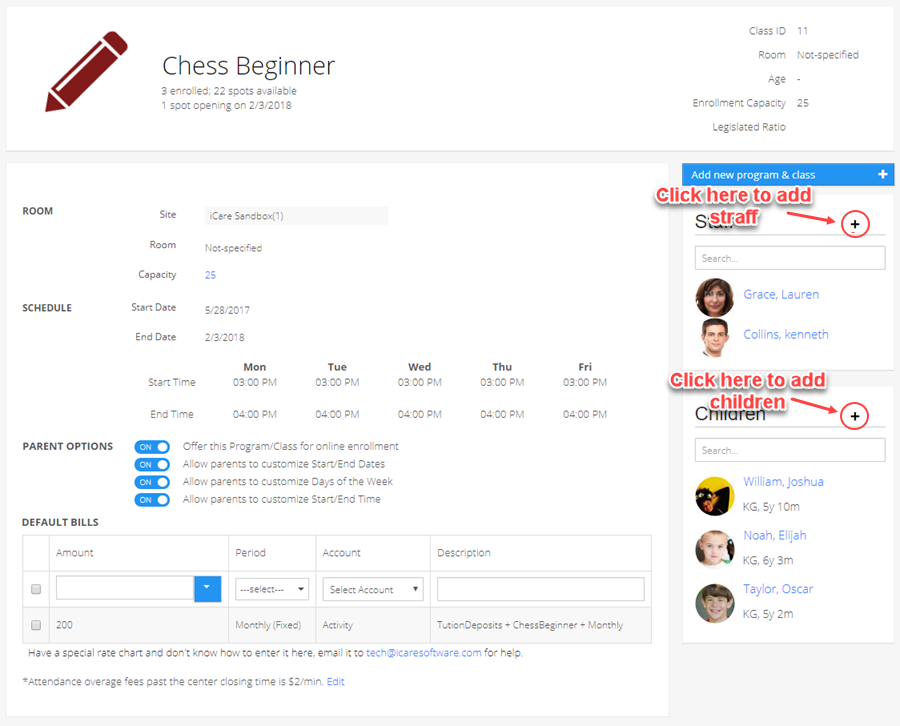
- You may now, enroll children and staff in Programs/Classes. Click a Program/Class name from the list.
- You’ll be directed to the P/C details page, use the add children and add staff buttons (‘+’ icons) to enroll children and staff.
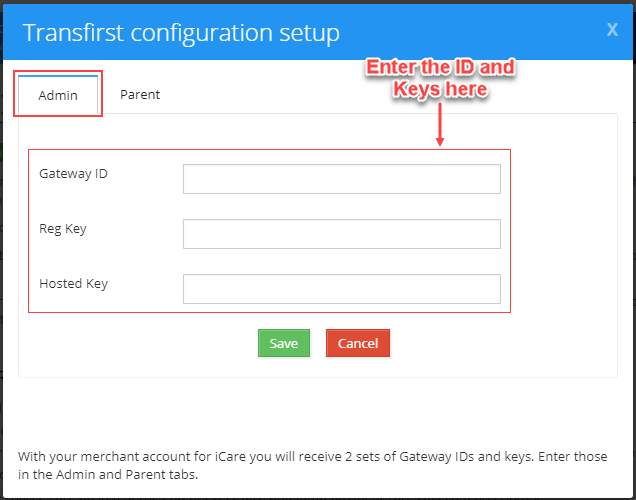
STEP 6: - Setup Payment
- To setup Payment Processing Account, click the Payment Processing Merchant Account link your screen,

- In Transfirst Confirmation Setup window, enter the Gateway IDs and Keys for both admin and parents. Click Save to finish.
Step- 7: - Setup iCare Lobby
- In this final step, please set up a Lobby Password to access and open the iCare Lobby,
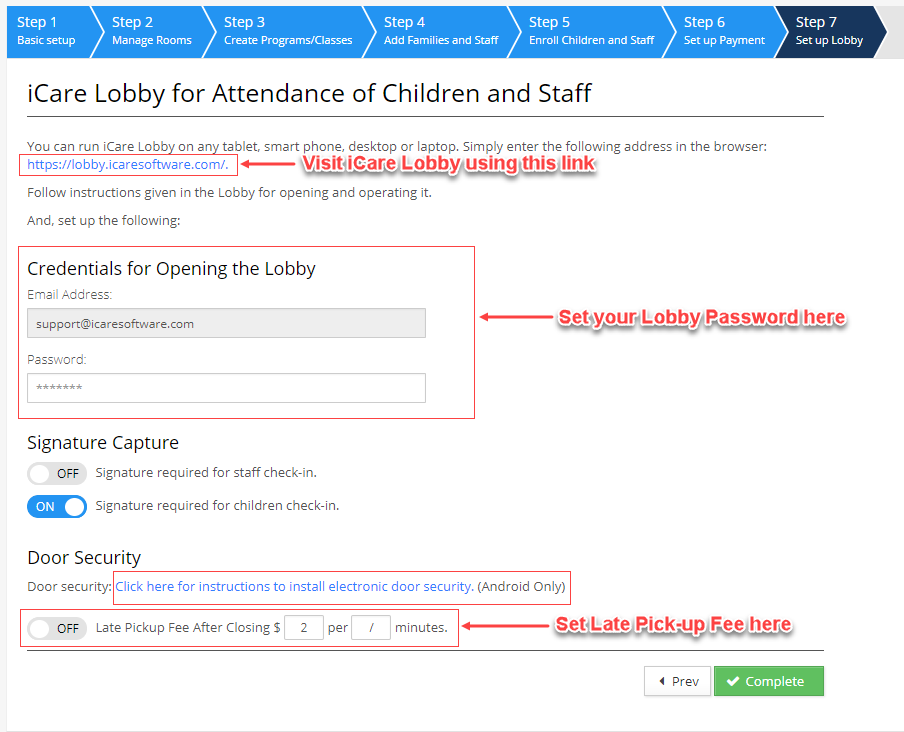
- Click on the link under the heading Door Security to see the instructions to install iCare Door Switch.
- Click Complete to finish.
- Congratulations, your iCare account is set up with all the necessary information, if you wish to make changes or update new information, go ahead and access your account.